Endpoint Deployment
This guide provides step-by-step instructions for deploying endpoints using supported operating systems. Follow the procedures below for BIOS configuration, creating a bootable USB, installing the OS, encryption, and post-installation steps.
Supported Operating Systems (OS)
Recommended
- RHEL 9
- RHEL 10
- Ubuntu 24.04
- Ubuntu 26.04
Other Supported OS
- RHEL 8
- Ubuntu 22.04
End-of-Life (EOL) Operating Systems:
- Ubuntu 20.04
- Ubuntu 18.04
- Ubuntu 16.04
- RHEL 7
For EOL OS requests, refer the PI/student to the Linux Team.
Process
1. Prerequisites (BIOS Settings)
Before installing the OS, update your BIOS settings by ensuring:
- Secure Boot: Disabled
- RAID: Set to AHCI
2. Create Bootable USB
Create a bootable USB drive by burning the ISO using tools such as Etcher.
3. Boot to USB
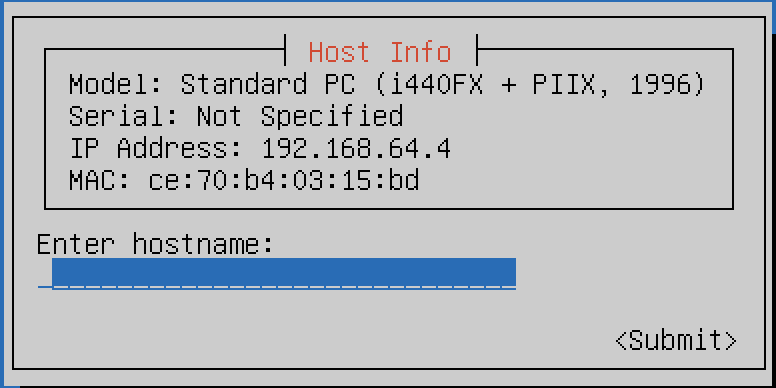
Insert the bootable USB and boot the system. The installer will guide you through:
- Selecting the OS
- Choosing the target disk
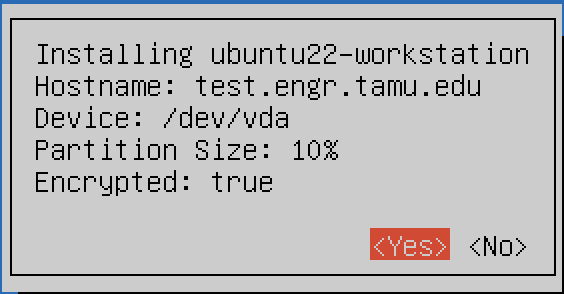
Selecting OS/Partition
- For disks ≤ 500GB: Use 100% root.
- For disks > 500GB: Allocate 10% root or 150GB, whichever is greater.
Naming Standards
| Environment | Naming Format | Example |
|---|---|---|
| ENGR | <4-digit DEPT code>-<Serial Number/Service Tag>.engr.tamu.edu | etid-servicetag.engr.tamu.edu |
| ARTSCI | <4-digit DEPT code>-<Location>.artsci.tamu.edu | math-bloc517.artsci.tamu.edu |
Encryption Step
Encryption is required for:
- Mobile devices.
- Systems handling FIPS or CUI data.
Encryption Password Guidelines:
- Use a password generator such as 1Password.
- Generate a random password.
- Write it down temporarily for initial use.
Post Install Steps
Ticket via TDX
-
Create a TDX Ticket and assign it to the appropriate queue:
TS-AO-Linux-Infrastructure -
Example Ticket Content:
Title: Endpoint Bootstrap –
<hostname>Details:
Required:
- Hostname:
<hostname> - IP:
<IP> - Type:
<Laptop/Desktop> - OS:
<Ubuntu or RHEL> - User NetIDs:
username1,username2,username3
Optional:
- Faculty Owner:
<NETID> - FIPS/CUI:
<Needed/Not Needed> - Software Requested:
<Yes/No> - Admin Requested:
<Yes/No>
- Hostname:
Provide the user with the welcome handout
Provide the user with a copy of the new linux workstation handout, or leave it on the keyboard. The printable handout can be found on the public linux docs page: